Quick support
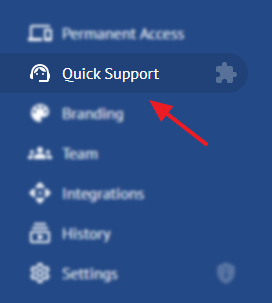
Use the left menu to go to quick support:
The section is meant to provide technical assistance upon customer requests.
Connecting to computers works as follows:
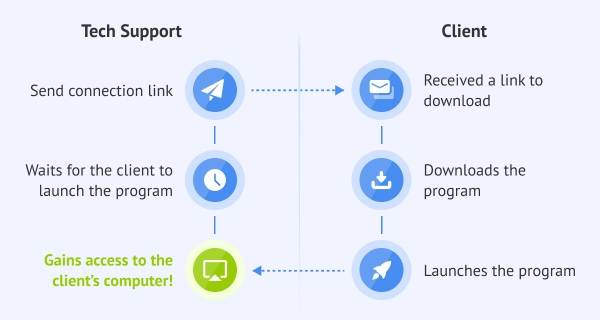
Invitation via link
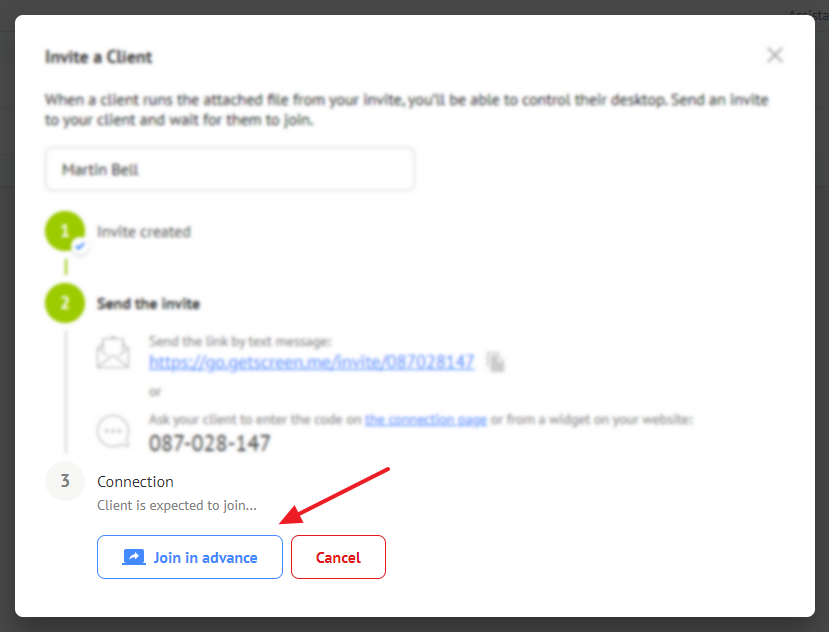
A new pending connection should be created for each client. Use the button in the upper right corner of the page:

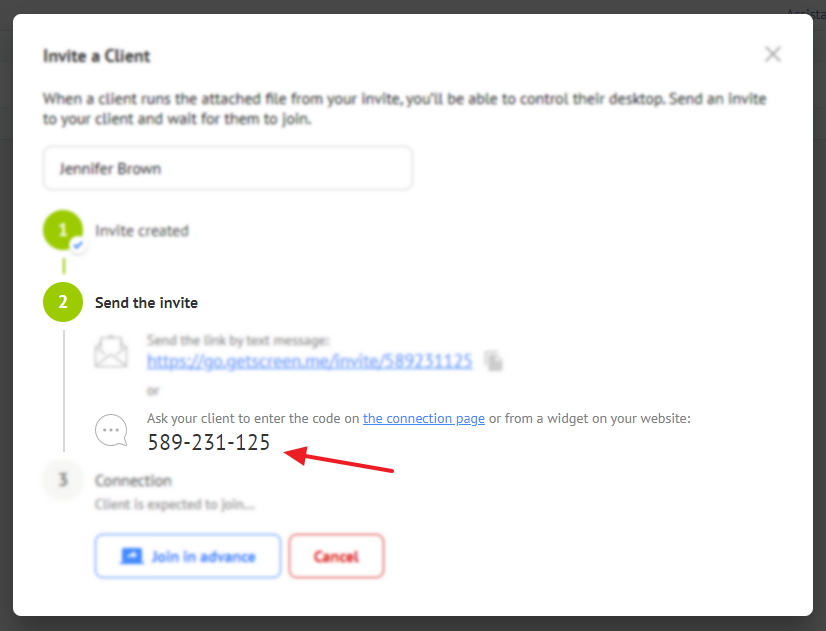
Specify a client name to identify the connection:
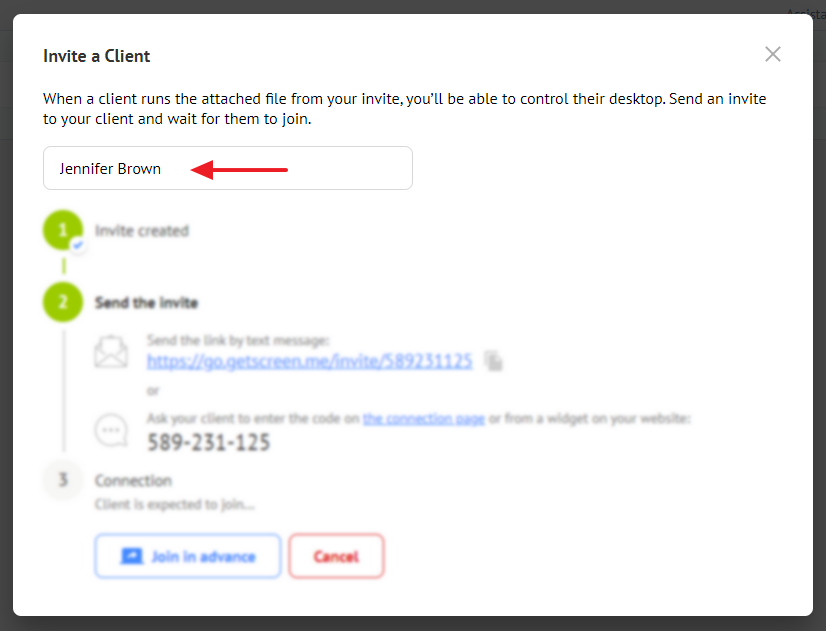
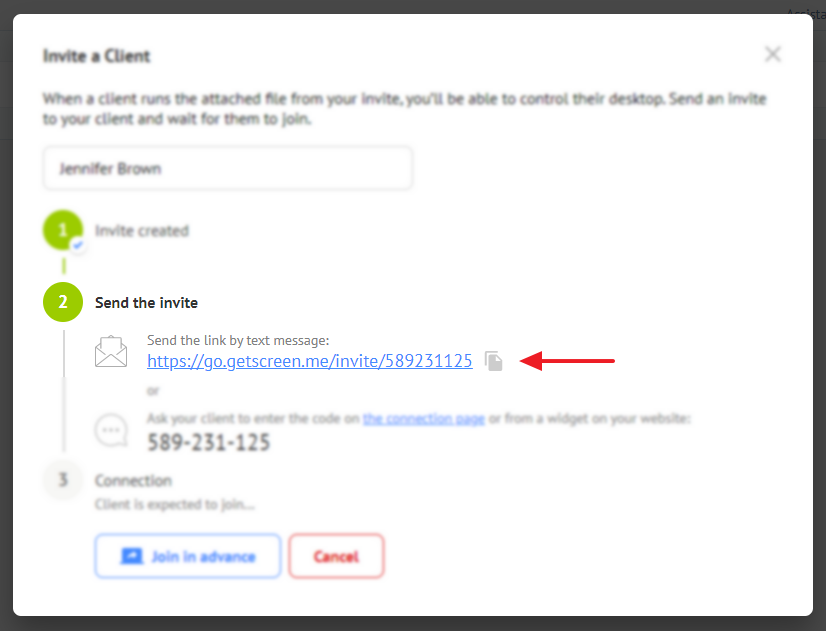
Next, copy the link and send it to the client:
You can close the invitation window. All created connections will be displayed in the list:
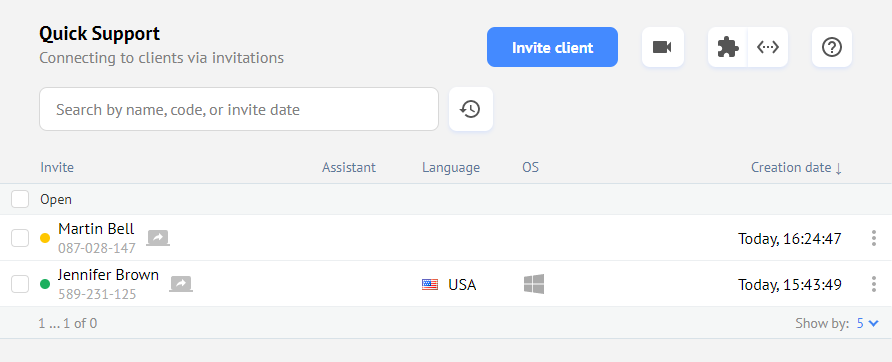
Invitation states:
- Green - a client has launched the invitation file;
- Orange - a client has not launched the invitation file yet.
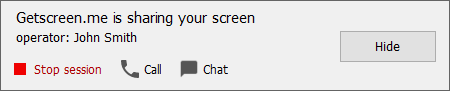
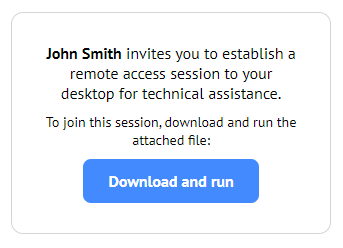
The link opens a message inviting a client to establish a remote access session to their computer:
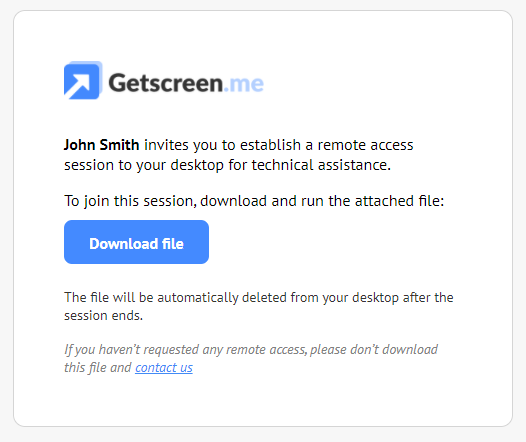
The invitation features the name or email address of a remote support team member.
 Specify your first and last name in the Profile, so that customers can see it in the invitation. This will improve user's trust and loyalty to the remote session.
You can also set your company name and logo in the invitation. To do this, use Branding. This will improve user's trust and loyalty to the remote session.
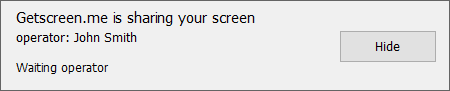
After a client downloads and runs the attached file, the connection is activated. The client sees the message about waiting for the operator:
Set up a launch notification in Telegram to avoid waiting for a client to launch the attached file. Find out more about integration with Telegram.
After clicking the Join button, the standard connection window is opened (see Connection).
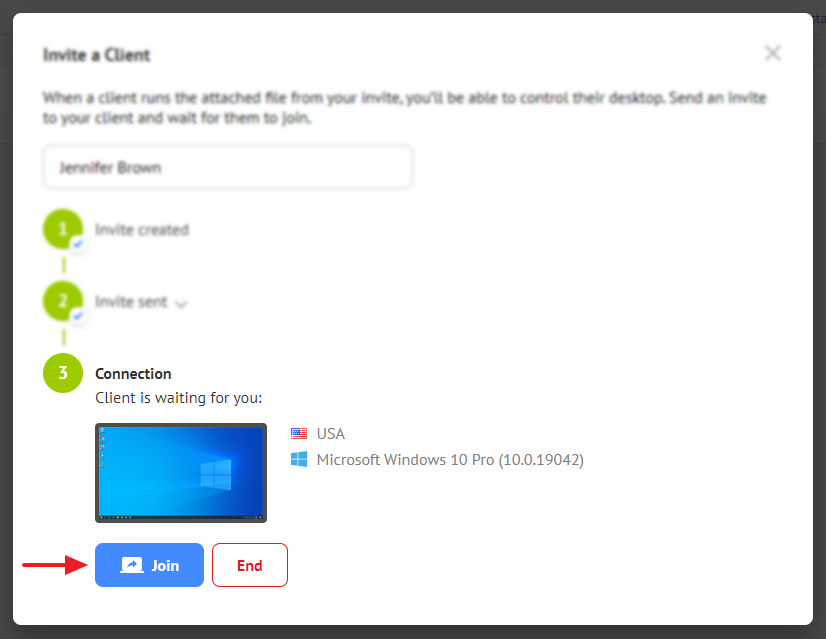
The client computer window becomes active:
You can open the connection window in advance. After a client joins, the connection is performed automatically. Use the Join in advance button in the creation window.
Invitation by code
If you communicate with clients by phone and it is inconvenient to provide a connection link, use a connection by code. Each connection has an invitation code:
To enter the code, send clients to the special page on our website or arrange the form on your official website. To do this, open the window to configure the widget:

Paste the widget HTML code into the website:
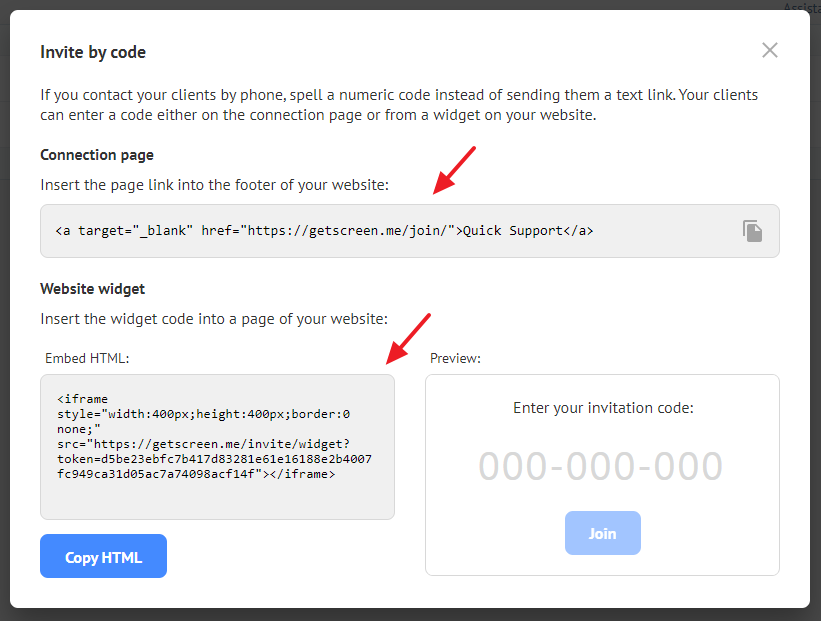
Direct customers to the page with the form and provide them with a unique connection code:

After entering the code, clients will see the invitation info and a link to the attached file:
One-stop Chrome browser extension
Install Getscreen.me - Remote Desktop Access and create invitations without switching to your personal account. See the details in the Google Chrome extension article.
Last update: July 2nd, 2025