Permanent access
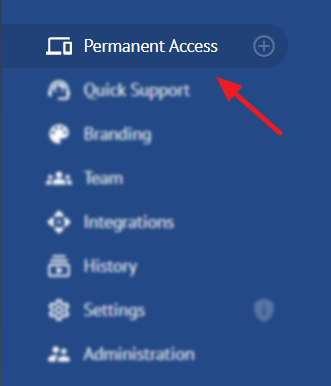
Use the left menu to go to the list of linked computers:
The list contains computers:
- which were used to log into the agent program (see Permanent Access);
- shared by other users (see Providing access).
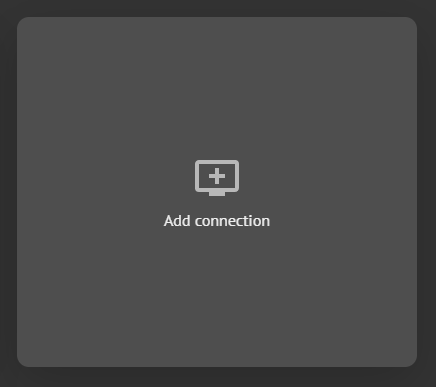
Add computer
To add a new computer to the list, log into the agent program (see Permanent Access).
Download the agent program from your personal account or the public download page.
To download from your personal account, use the add button:

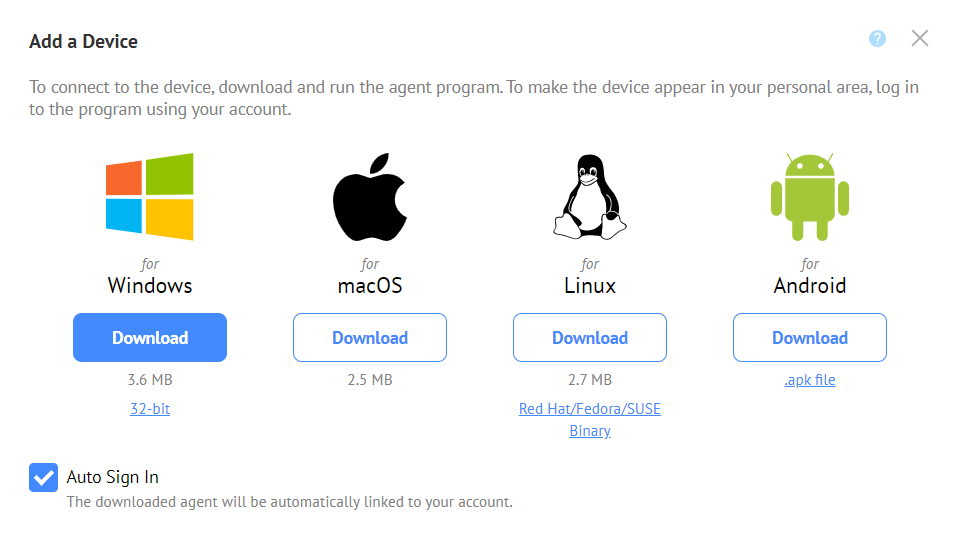
In the new window, download the file for the operating system installed on the remote computer:
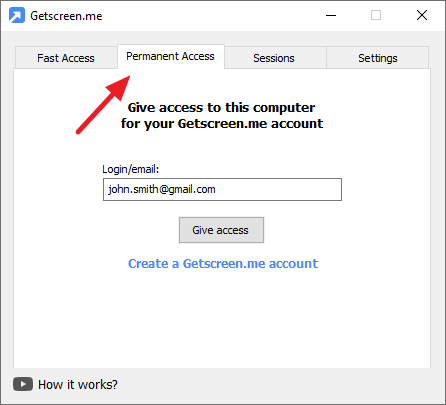
Run the file on the computer you plan to manage. In the Permanent Access tab, log in using your account:
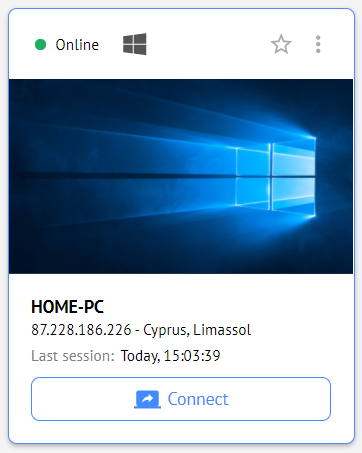
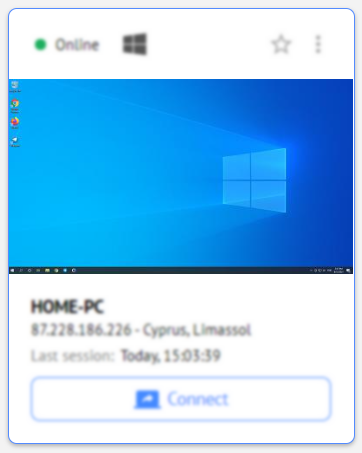
After that, a preview of this computer will appear in the list:
Adding multiple computers
To add multiple computers, use the Auto login option when downloading the agent program:

Distributions downloaded with this option enabled are automatically linked to the account and will appear in the list after the launch.
Computer info
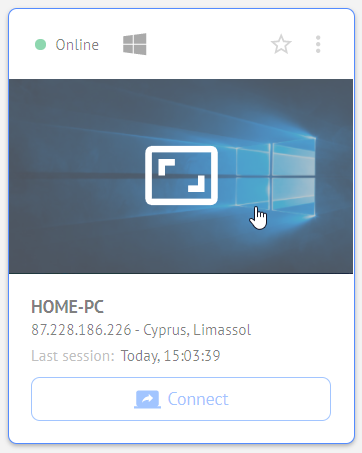
The preview of each computer added to the personal account contains brief info about the device state and launched agent program.
Computer state
Displayed in the upper left corner:

It can have the following values:
- Online - computer is "in the network" and is available for connection;
- Offline - computer is not "in the network" and is unavailable for connection;
- Not installed - agent program is not installed on the computer. The computer is available for connection. The access will be lost after the device is restarted;
- Disabled - computer is blocked, connection is unavailable (appears when the service plan limits are exceeded);
- Limited - connection is available, the access will be limited within 10 days after adding (appears when the service plan limits are exceeded for the first time).
Operating system
Displayed as icons:
![]()
 Clicking the icon opens the window with system data about the remote computer.
Screenshot
Displayed in a tiled list view:
The image is captured once a minute.
The desktop preview can be disabled in the computer card Settings.
Computer name
Displayed as a bold header:
Specified in the computer card or the agent program settings (see Computer name).
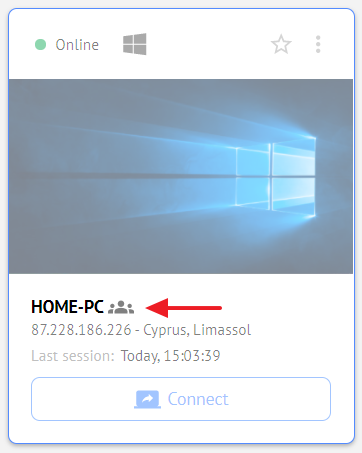
Team access
If you work in a Team and your computer is available for other members, the corresponding icon is displayed next to the computer name:

If necessary, the owner can restrict access to any computer (see Access limitation).
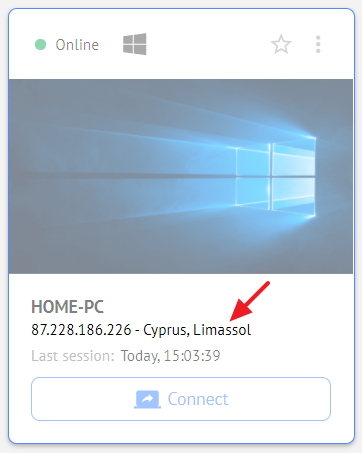
Computer geolocation
Displayed as IP address, city and country name:
Connection
To connect to a computer, click Connect:
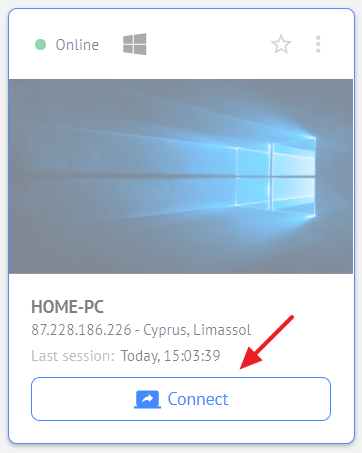
For more information on managing a computer during connection, see Connection.
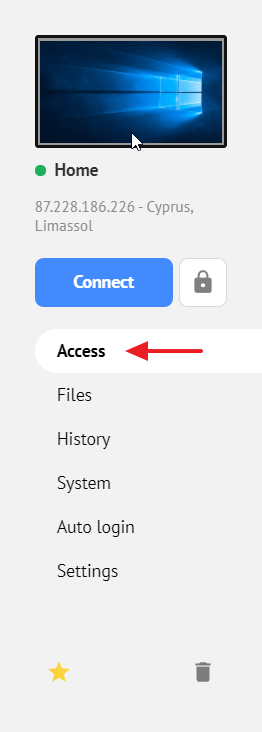
Computer card
The card contains all settings and additional functions for working with a remote computer. Click on any area of the tile to access them.
Providing access
You can share access to your computer in three different ways:
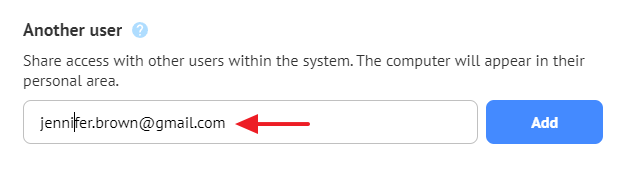
With another system user
Enter the login/email of another user of the system and click the add button. After that, the computer will appear in the user's list.
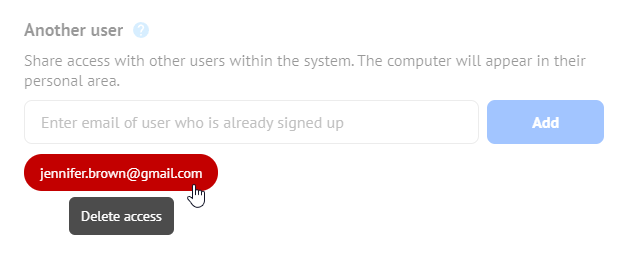
Your computer having public access is marked with a corresponding icon:

Other computers you have been granted access to are marked with the icon:

To remove access, click on the user's email address.
Permanent link
In addition to connecting from a personal account, you can connect to a computer using a permanent link if you are authorized in your personal account.
The permanent link is designed to integrate connection to external customer service systems, such as a CRM system.

Customize the path of the link to make it unique and readable.
Use the Branding settings to change the subdomain.
To allow connections for unauthorized users, enable a numeric password (see Access by invitation).
One-time link
Use a one-time link for a short-term access to a computer. The link is updated after each connection or once a minute.
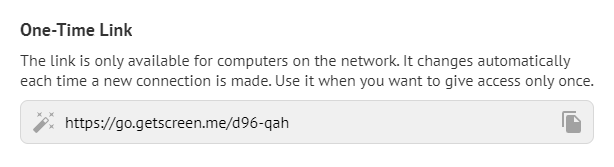
To disable connection via an already sent link, generate a new one using the appropriate command:

File manager
You can download necessary files from a remote device without connecting to it.
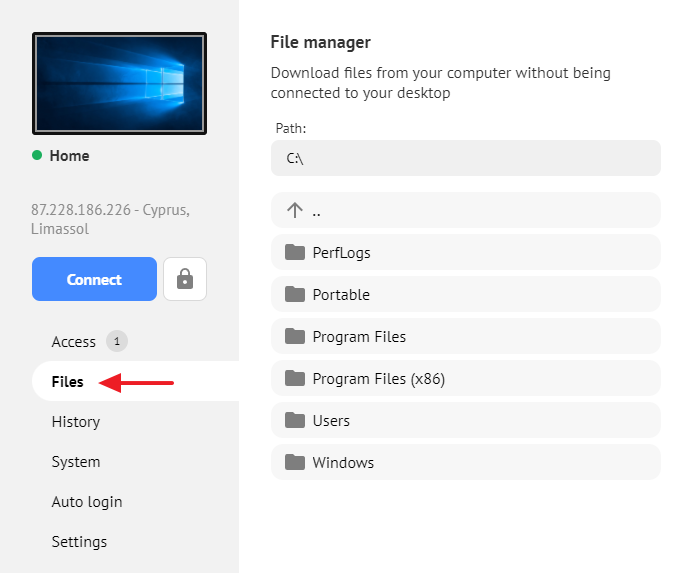

 The size of the transferred files is limited by your service plan. There are no other restrictions.
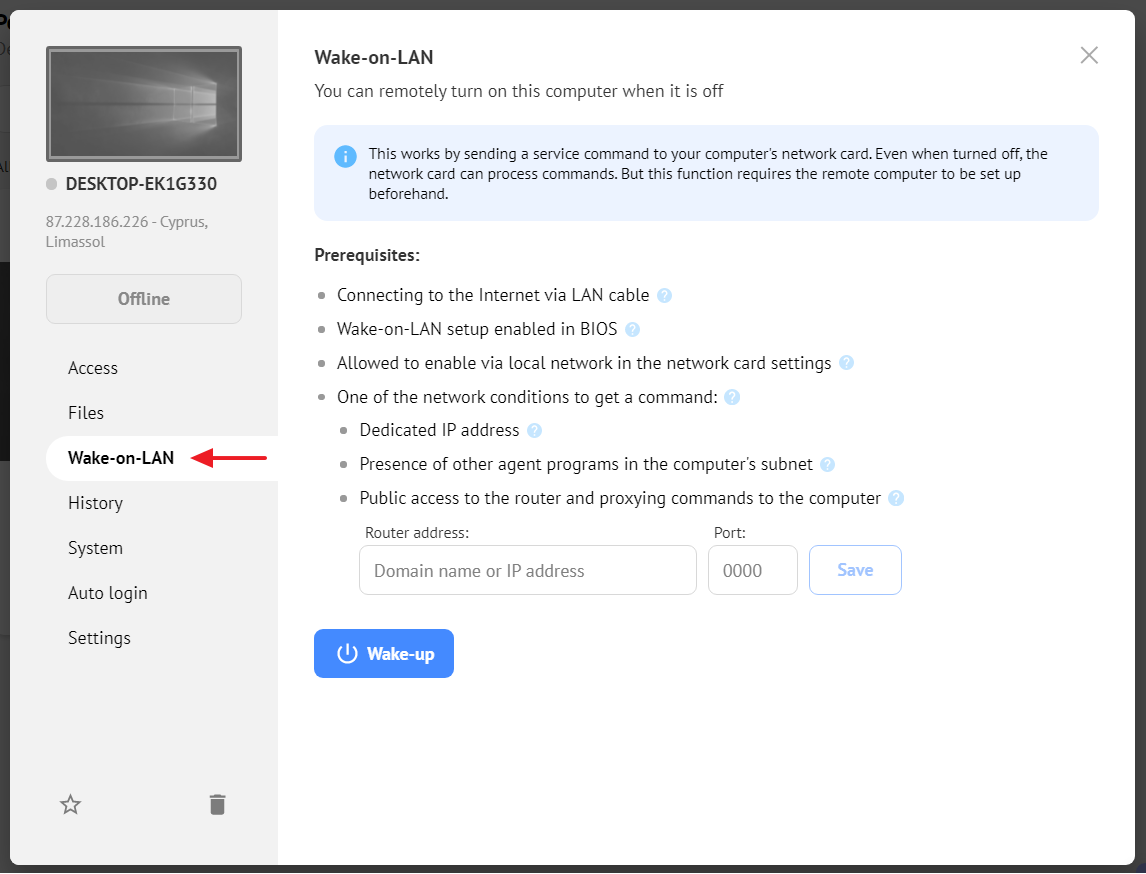
Wake-on-LAN
Wake-on-LAN (WOL) is a standard protocol for remotely waking up computers that are in low-power mode (turned off but still have access to a power source).
The enabled Wake-On-LAN allows the network adapter to constantly scan the network for the Magic Packet command initiating the enabling of a personal computer.
Prerequisites for waking up a computer:
- Internet connection via LAN cable;
- enabled Wake-on-LAN setting in BIOS;
- enabled turning on via a local network in the network card settings.
- one of the network conditions for receiving the command:
- dedicated IP address;
- presence of other agent programs on the computer subnet;
- public access to the router and proxying commands to the computer.
Activation in BIOS
To configure Wake-on-LAN in BIOS while booting the device, press a certain key (F1, F2, F11, Escape or Delete depending on the device). After that, enable Wake-on-LAN in the BIOS menu.
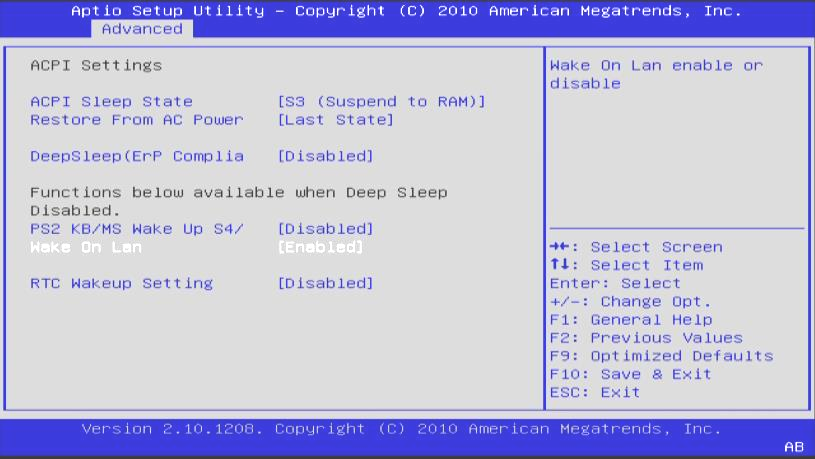
Motherboard manufacturers may have different names for WOL (Agressive Link, ErP, PME).
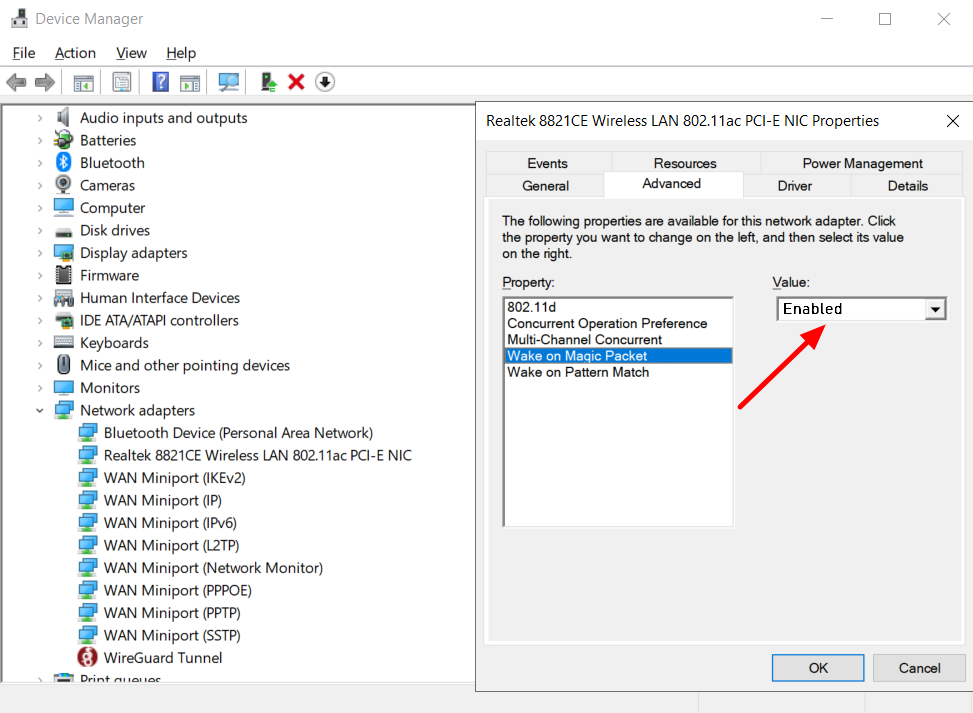
Setup in the Device Manager
To configure the network card, go to the Windows settings and launch the Device Manager. In the «Network adapters» branch, select the one the Ethernet cable is connected to.
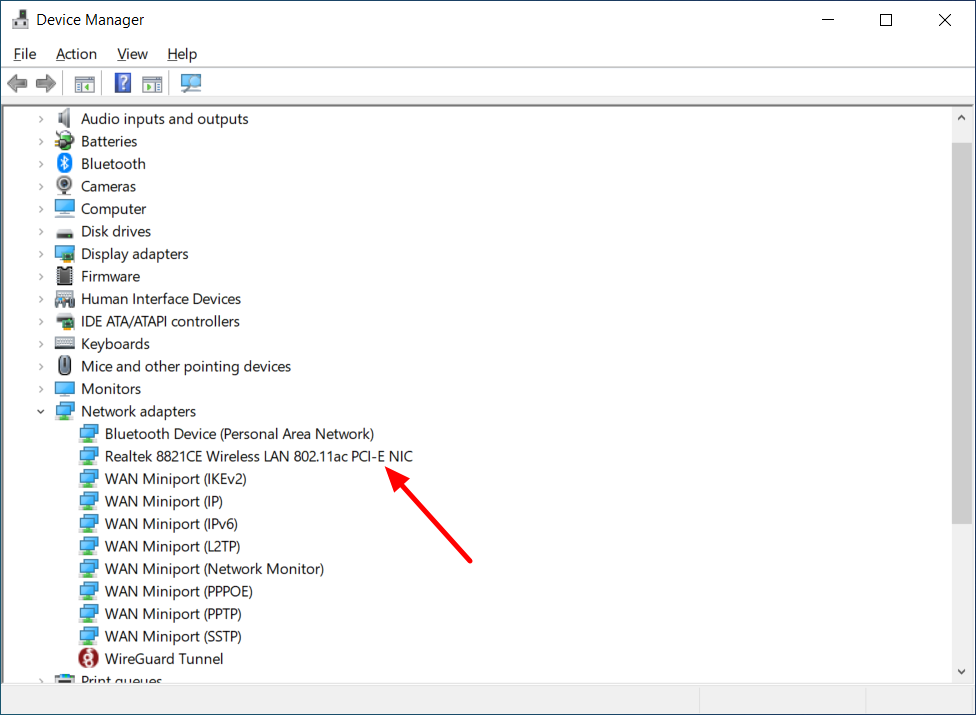
Click on the selected adapter. In the new window, go to the Advanced tab and select the Wake on Magic Packet property. The value should be enabled.
Next, go to Power Management and allow the device to wake up the computer using Magic Packet.
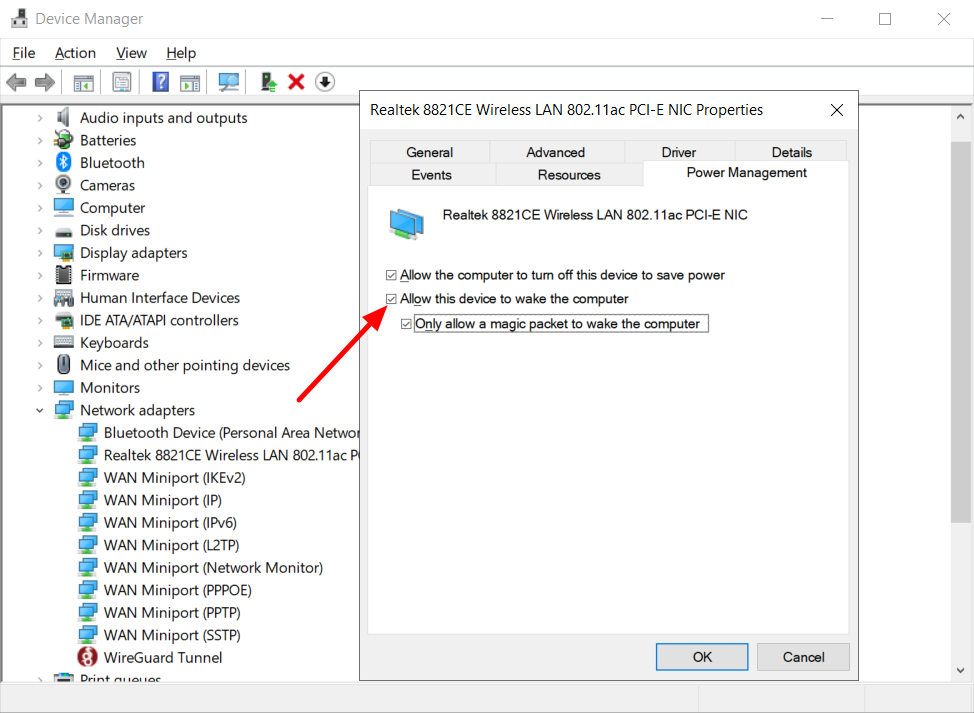
Now your computer is ready for a remote wake-up using the Wake-on-LAN function.
Wake-up
After activation in BIOS and the network card configuration, go to your personal account. In the Permanent Access section, select the computer you want to wake up.
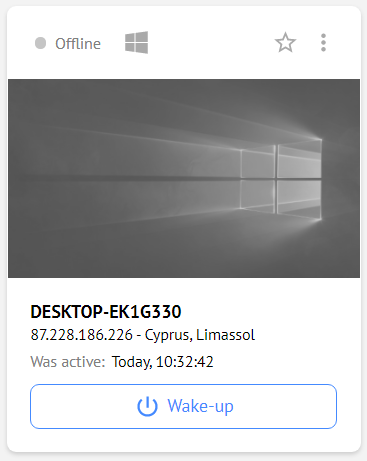
Next, click Wake-up.
Our server sends the Magic Packet command to your computer using all possible methods:
- to the computer's public IP address;
- over the local network from neighboring agent programs (if any);
- to the specified IP address and port (see Router settings).
The first command to reach your computer wakes it up and the computer appears on the network.
Router settings
You can send the Magic Packet command to the specified IP (or domain name) and port. This may be necessary if you are using a dedicated IP address or another router to connect your computers to the Internet.
To do this, enter the following data in the computer card:
If you are using a router, you can configure routing within your local network using different ports.
Connection history
In the history, you can view the list of recent connections to the device as well as download video recordings if any.
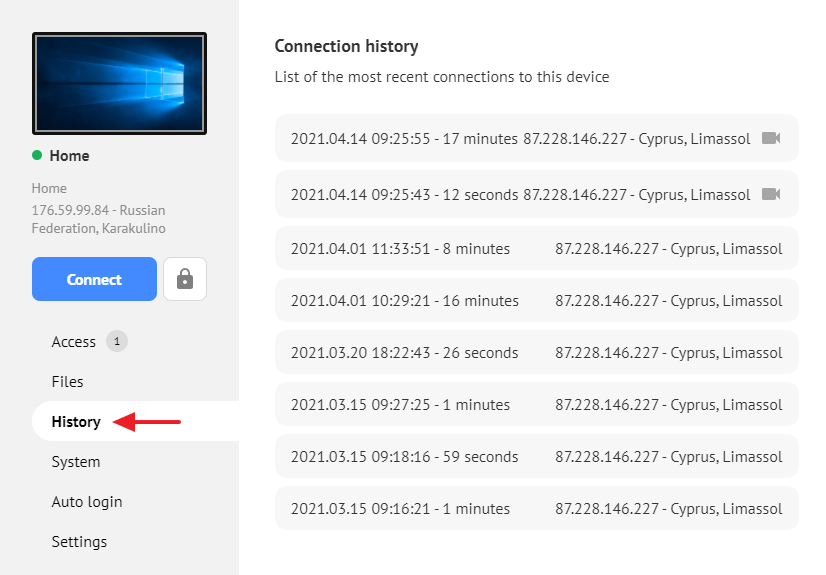
The list is sorted by the time of the last connection. Older entries are loaded automatically when scrolling down to the last item in the list.
Hovering over a line yields additional data about the browser and the operating system of the device the connection was performed from.

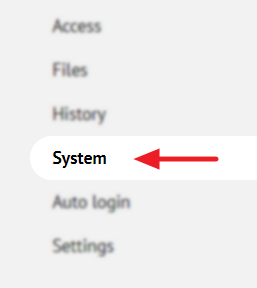
System information
You can also use the button with the operating system icon in the list of computers to quickly switch to the system info.
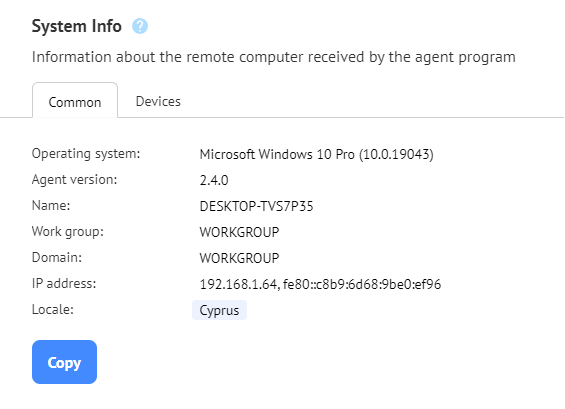
General
The first tab displays general information about the system:
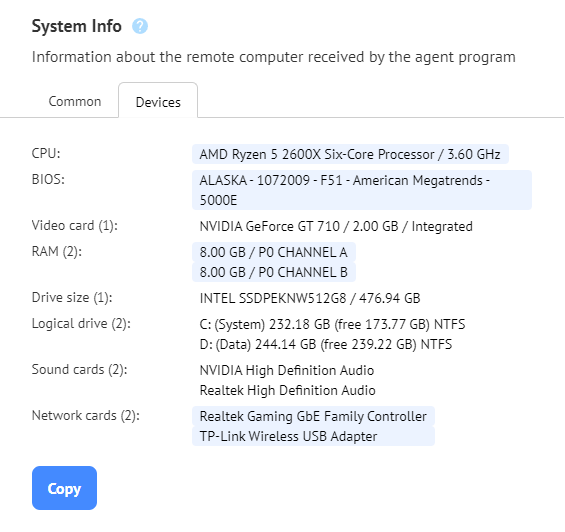
Devices
The second tab contains detailed configuration of a remote computer:
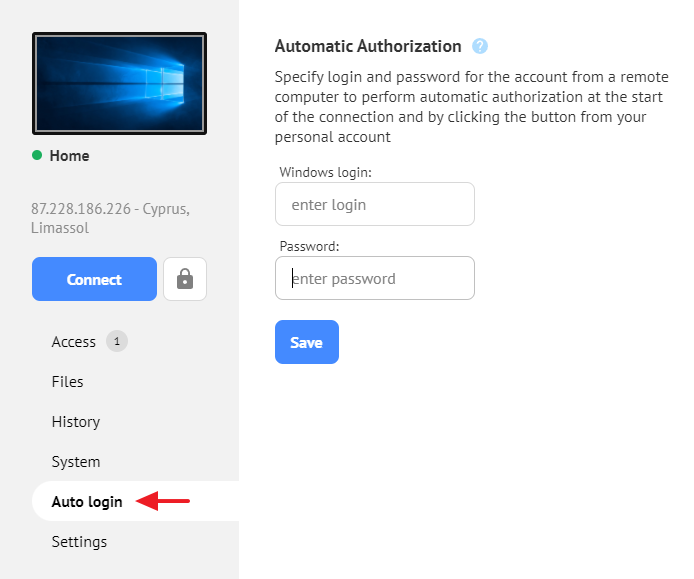
Automatic account authorization during connection
Specify the Windows account login and password on a remote computer in the Auto login section for auto login during the connection start:
You can also lock/unlock a device by clicking a single button in the computer card with no actual connection:
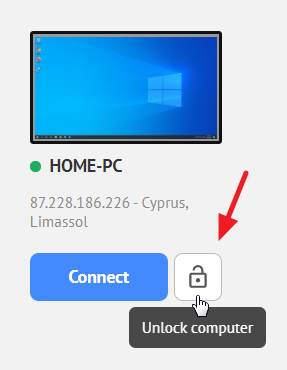
If the computer was automatically unlocked using this option at the start of the connection, it will be automatically locked after the connection is completed.
Computer settings
For more convenience, you can change some settings for an added device:
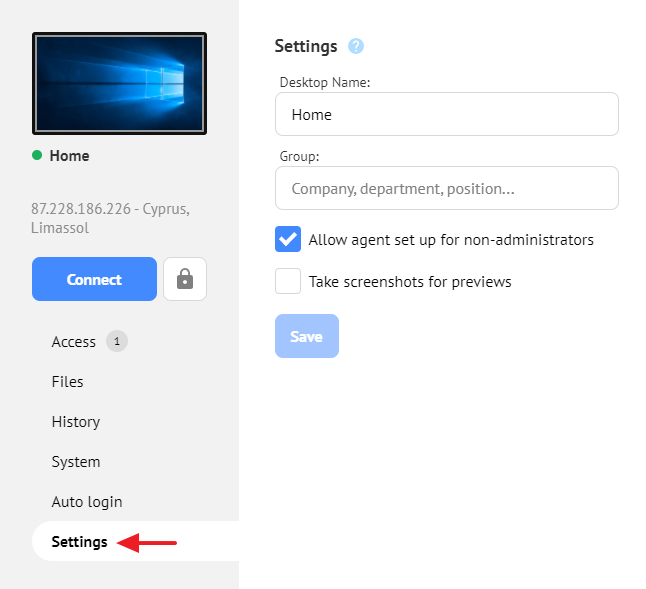
Name
Displayed computer name (see Computer name).
Group
Arbitrary group a computer belongs to - an office, department, floor, or something else. The value can be used to arrange a list (see Sorting and grouping).
Allow configuring the agent program without the Administrator right
Enable/disable changing the settings (including exiting) of the agent program launched on a remote computer for operators having no Administrator right.
The setting is available only for computers with the specified agent program.
The setting is available only for the Windows version of the agent program.
Take screenshots for preview
Enable/disable taking screenshots for a device preview in the personal account.
If the screenshots are disabled, standard OS wallpaper is displayed instead of the preview.
Sorting and grouping
For grouping and sorting, use the Favorite agent buttons and the block for configuring the search line list:
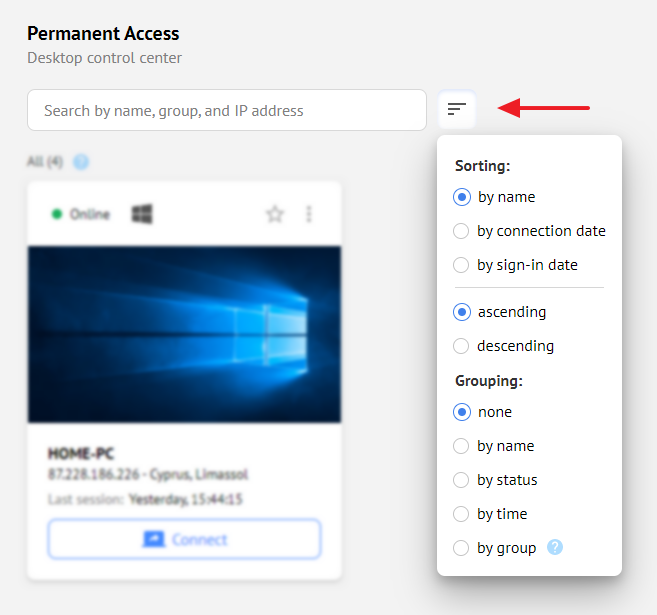
"Favorite agents" will always be in the first group.
Possible sorting criteria:
- by computer name (case insensitive);
- by connection date (date of the last connection to the computer);
- by login date (date the computer was added to the personal account).
Possible grouping criteria:
- alphabetically (case insensitive);
- by status (see Computer status);
- by time (last use);
- by group (arbitrary group, see Group).
List presentation
To change the list presentation, use the switch in the upper right corner of the page:

There are two types of presentation: line and tiled:

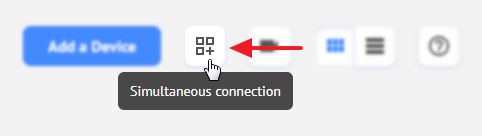
Simultaneous connection
To connect to several computers at the same time, click the button in the upper right corner of the page:
Select one or more devices you want to connect to:
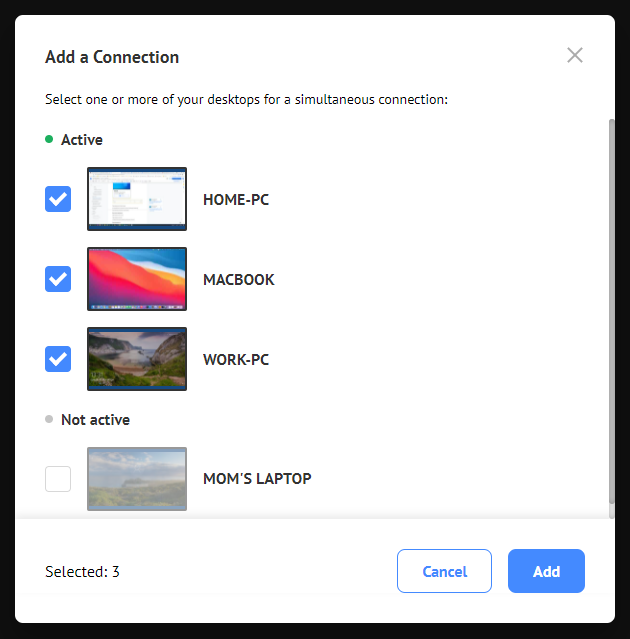
After adding, the window with connection to the selected devices is opened:

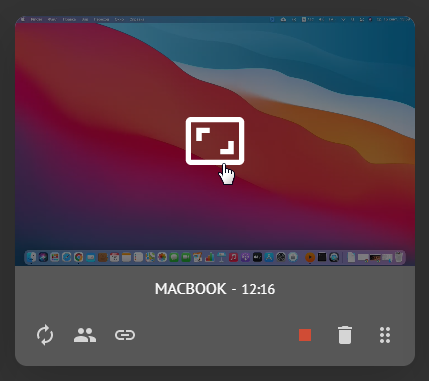
The list of selected computers is saved during the next switch to concurrent connections.
Click on the desktop preview to go to one of the computers:
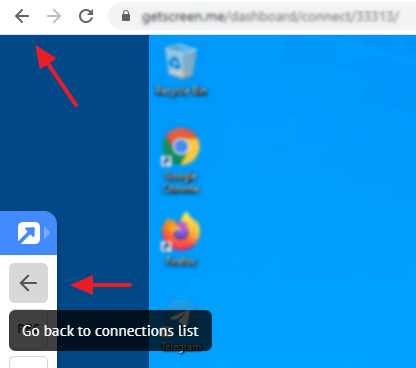
To return to the list of simultaneous connections, use the Back button in the connection panel or use the Back button in the browser.
Available functions
Connection reset
Quickly re-connect to a computer:

Share access
Open computer access settings in the pop-up window (see Share access with another user):

Permanent link
Open computer access settings in the pop-up window (see Permanent link):

End connection
Quickly end connection to a computer:

Remove from the list
Remove a computer from the list of simultaneous connections:

Move preview
Change the order of computers in the list of simultaneous connections:

Add a new device to the list
Connect and add a computer to the list of simultaneous connections:
Connection auto recording
To enable/disable connections auto recording, click the corresponding button in the upper right corner of the page:
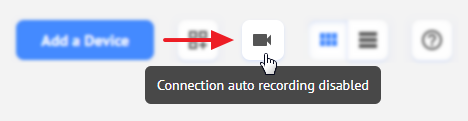
Connection recording can be downloaded in the general History or in the computer card.
Last update: July 2nd, 2025